CodeProject
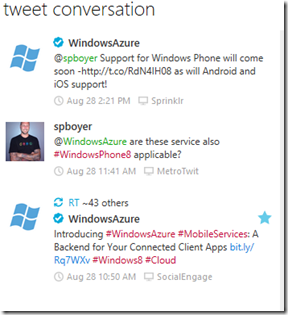
As usual throughout the day I have MetroTwit open and toast are constantly popping up here and there and I glance over to see what’s what. Then I see. from @WindowsAzure this:
And all work stopped for me to check this out. Other than Windows Phone and Windows 8; I really love the new ASP.NET WebAPI and REST Services capabilities it has made so easy (watch for my next post on that), and seeing this I was thinking – awesome but only for Windows 8??? So…I immediately responded and got a response:

Spending the last day or so checking into the walk through for Windows 8, check them out here. I went through the initial walkthrough for a Windows 8 application, and during this I wanted to see the data that was going back and fourth so I opened my favorite tool Fiddler to see the HTTP calls, which then lead me to see that I could easily use these services for Windows Phone 7 now!
Here is a quick walk through a how to get setup.
Getting Started
In order to start using the preview of the Mobile Services in Azure, you need to have a Windows Azure account or you can sign up for a trial account. After you login, go to your Account Center and select the Preview Features from the top menu.

I have already signed up for the Mobile Services, so you will see a “try it now” button and go ahead click that to get started. Once you get transferred to the, unfortunately still called the “Preview” portal, you’ll notice on the left menu that there is a new **Mobile Services **section.

Next on the bottom portion of the management portal you will see the +, which you simply click to add the new Mobile Service.

Choose create and the New Mobile Service dialog is presented; enter the name of your new mobile service, select or create a new SQL Server Database, and finally select the Region for your instance. There are some other options in the “Configure advanced database settings” but we’ll not do that now for simplicity sake.
*** As a note, if you create a new database; remember the credentials. You will need this information if you choose to add another database to the server later.
Upon completion of the wizard, the management portal will tell you its creating…, the poof its there. I named mine “testmobileservice”.

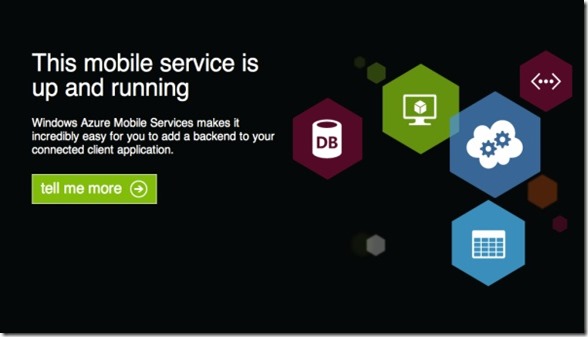
if you click on the URL, you’ll be presented with the following page…

These are just services, or a service endpoint. The closest thing I can really relate this to is in SQL 2005 we were given the ability to expose certain objects as web service endpoints, it was a neat feature but not widely used and still available to my knowledge. Sorry I digress, let’s get back to the management portal and create a Todo table.
If you click on the Mobile Service name you see the following screen, and although the initial announcement was for Windows 8 support and the walkthroughs etc. show that, let’s just create a table and I can get to Fiddler and show you how the data looks to and from the REST Service.

Click over the the DATA tab, then the + on the bottom the add the table. Name the table ToDoItem and click the check to create the new table.

Pretty simple right? Just created a new table in a database by simply naming a table…DBA’s are freaking out around the world right now.
Ok, so go back to the DASHBOARD and find the MANAGE KEYS icon at the bottom, and we are going to add/create a new Application Key for the Mobile Service.

Now there are still some things under the covers here that I am still finding the answers too, but my first guess is this is some iteration/flavor of oAuth. But, go ahead and copy down the Application Key that is generated for you. At this point, there is only one key and if you regenerate post deployment then your app will break so be careful with that little regenerate button of power.

Click the check mark and you are ready to start.
Interacting with the Endpoint via REST
Using Fiddler to see your HTTP calls going to and from RESTful endpoint is great, BUT there is also a little tab in there that most developers don’t realize is there. It’s the Composer tab. You can either originate a call in there OR drag a previous call from the left side to the composer tab and make changes to it and hit the execute button. Great feature!

What are my EndPoints?
Interesting how this works…
The endpoints are formatted as [https://your new service address]/tables/[table name]. So in my case, the RESTful endpoint for the TodoItem table is: https://testmobileservice.azure-mobile.net/tables/TodoItem. I have inserted a single record already so we can construct a GET call in Fiddler to see what is returned.
Do this by again, going to the composer tab and inserting the url for the endpoint in the location box and in the Request Headers you will need to add the following:
User-Agent: Fiddler
Host: testmobileservice.azure-mobile.net
Accept: application/json
X-ZUMO-APPLICATION: [YOUR APPLICATION KEY HERE]The X-ZUMO-APPLICATION header key/value pair is the secret sauce, I am sure that when the official SDK for these services is released for Windows Phone; there will be some better way to put this all together or maybe not, cause let’s be honest REST is EASY!
So Click the Execute button and we get a nice JSON result returned
[{"id":1,"ToDoText":"Text1","ToDoId":1}]But wait, can we get XML too? No, it does not appear so. Trying to change the Accept header to “Accept:application/xhtml+xml,application/xml;q=0.9,/;q=0.8” to get xml does not work. Also it is important note that if the Accept header is not sent, JSON is also returned.
It is my assumption that, as you can do in ASP.NET Web API, the services are doing something like
HttpConfig.Formatters.Remove(HttpConfig.Formatters.XmlFormatter);in order to force JSON, this is a smaller payload and is the more preferred format for REST based services.
Inserting / Updating Data
Again remember that these are simply REST based services, so you can just do the same as above and instead of calling with a GET, do it with a** PUT (405 Method Not Allowed)** or POST and pass a payload of type ToDoItem. Here is an example of an insert.
Change the dropdown in the composer tab of Fiddler from a GET to a POST (INSERT) and in the Request Body add the following text:
{ "ToDoText":"Text1" , "ToDoId":2}Click the execute button and on the left window you should get a Result of 201 and the response sends back the newly created item in JSON.
{"ToDoText":"Text1","ToDoId":2,"id":2}
Methods Allowed – GET, POST, DELETE
Dynamic Tables
So what’s really behind this? Is it SQL Server, a flavor of NoSQL running inside SQL? Is this table storage with some magic? Let’s call a POST method and add some new fields and see what happens here.
Here is the new JSON payload:
{
"ToDoText":"Text1" , "ToDoId":3,
"ToDoWhen": "12/01/2012",
"ToDoByWho" : "Shayne Boyer"
}The highlighted rows here we already had in our table before, but I am passing in some new data fields. And it works, very cool…
What does a get return now that we have the new fields in one but not in the other?
I like it! Data Model changes, NoSQL style in Runtime. You see that we now get the fields in the previous records available to us for an update later and they are automatically set to NULL. Now one thing to note that there is no ability to remove a field. You would most like have to delete the table from Azure and start clean.
So there it is, if you can hit REST with any of you coding skills you can use this. Doesn’t necessarily have to be Windows 8. It can be Windows Phone, iOS, Android or Raspberry Pi for that matter. It can even be a web page. Look forward to what more is to come from this and Azure in the future!
Let me know if you have any questions, please comment.

